
How To Install A Garage Door Opener?
Most recently developed homes today have an associate electronic garage door opener. This eases access, safety, and security. However, several drive choices square measure available: chain, screw, belt, direct, and jackshaft.

The most ordinary garage doors taunton found setup is that the ceiling-mounted gap, that connects to the door’s within. We’ve provided a basic guide that will assist you to pay attention to this task if you’re a DIYer.
Remember that we tend to advocate that you just involve specialists to tackle such advanced jobs. Not solely as a result of you’ll be able to injury the instrumentation however conjointly as a result of you’ll be able to hurt yourself. Our team of specialists at Garage Door Doctor is often out there for skilled support.
Start by checking if your garage door is working properly. It opens and closes properly and doesn’t have any loose cabling or broken components, and is additionally well greased.
Remove all hanging ropes and cords
Prepare the required—clamps, measure tape, a drill machine and bits, and totally different sized wrenches. confirm you’re close to the associate receptacle.
Step 1: grouping The Opener
- Fit the rail sections along
- Slide self-propelled vehicle on to the rail
- Connect rail to the motor
- Fix the simple machine to the tip of the rail
- Slide a belt or a series from one finish of the rail; glide it around the simple machine, then fix it round the motor
- Now fix the belt or the chain finish to the carriage
- At the tip of the chain could be a screw that may hold the whole against the self-propelled vehicle and bear the door tension
Step 2: Attaching The Opener to the Ceiling
- Start with putting in a block on the ceiling, and therefore the opener is connected to the present wood. The wood should be nailed or screwed to confirm it holds the load of the opener.
- Now screw the bracket to the door wall and connect the opener assembly thereto. Then, connected the tip of the motor to the block victimization screws.
- Ensure you have left concerning 7-9 feet of area on top of the ground to permit space for folks walking under that. Then fix the opposite piece of the bracket to the door as per the directions.
Step 3: Installation of alternative parts
- The opener packaging should be having a security disconnect cable. Attach this cable to the motor and slide it onto the bracket and therefore the handle. It ought to be marked as associate emergency unleash.
- Remove the emergency unleash cable and take a look at the door by a gap and shutting it to create certain it operated swimmingly. Then add the stop bracket at the motor.
- Fix a lightweight bulb to require care of the vibration of the door while not burning out. Then install the electrical eye and reflector.
- Then the management button is to be put in and confirm it’s out of reach of kids.
Step 4: Testing The recently put in Opener
- It is time to currently power on the garage door and takes a look at its victimization of real electricity.
- Test the door with the wall management and therefore the remote.
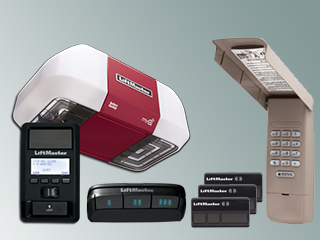
Garage Door Accessories
There square measure alternative additions which will be enclosed with a garage door installation that may influence the general price. In some installations, weather trim is required to bridge the gap between the door and framing and may either be enclosed as a collection price on the prime of installation or as per-foot valuation. We do both, however, tend to advocate and install the trim alongside the initial installation.